I’ve moved from a shared hosting provider to a virtual private server (VPS) provider for quite some time already. Having purchased an unmanaged solution, I had to learn how to set everything up myself. The first time was pretty time consuming as I was worried mainly about security and thus spent much time researching for the best practises before letting my VPS go live. Since then, I’ve moved host twice and during these moves, I spent much time again doing the very same thing. Not wanting to spend any more wasted time researching the same things over and over again, I decided to document the steps I took. Here are some steps that you can consider and follow before letting your VPS or DIY NAS go live.
Tag Archives: DIY NAS
DIY NAS – Seafile (Self-hosted Dropbox)

There are many ways to transfer files between your devices and your NAS. The most popular and obvious method is via FTP. There are other ways as well and one of them is via a software called Seafile. Seafile is similar to the likes of Dropbox where it focuses on syncing files between devices. By running Seafile on your NAS or server, you will be able to host your own Dropbox like service. There are many other free alternatives (ownCloud, Sparkleshare etc) as well but for this article we will be focusing solely on Seafile.
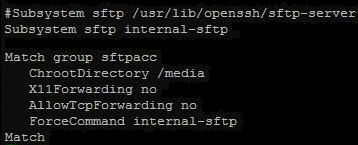
DIY NAS – Remote File Access (via SFTP)
Now that we have set up our basic firewall and port forwarded the necessary ports, we will now learn how to make use of that to enable data communication from outside the local area network (LAN). There are many protocols and ways to do this; SFTP is my chosen method and that is what you will be learning today.
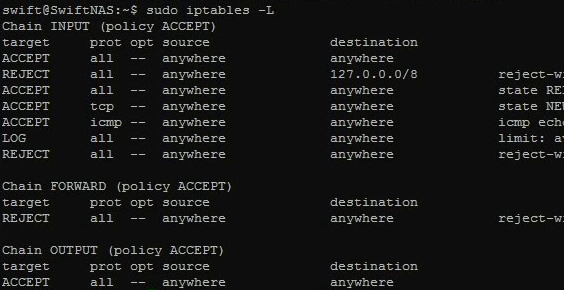
DIY NAS – Basic Security: Firewall (iptables)
Now that you have learnt how to enable global access to your server, you should prepare your server to be ready for the outside world. There are many different measures that you can take to prevent your server from being compromised. One of the more “straightforward†methods is to setup a firewall. This tutorial will show you and guide you to do just that.
DIY NAS – Port Forwarding and Dynamic DNS

Ready so say “hello world†proper? In order to access your DIY NAS or home server or game server or whatever that is hosted at your house, you will need to do something called “port forwardingâ€. Port forwarding is usually performed and set up at the router level. Since there are hundreds and thousands of routers, I will be recommending you a few sites that you can take reference from. I will be using a popular custom router firmware (DDWRT) to illustrate the different steps that you will need to take in order to forward your ports correctly.
DIY NAS – Backing Up Your Files (Remote)

A few days back I wrote a guide about backing up your files locally. This time around, I will be teaching you how to backup your files in a remote location say another NAS in another house. For a clearer understanding, do read up on the previous guide. For this guide, I will jump straight into the steps to backup your files remotely and cut short the explanations that are already done previously.
DIY NAS – Backing Up Your Files (Local)

Now that you have started storing your precious files and data into the NAS, it is time to back it all up. It isn’t fun when you lose all your data. Things such as photos and videos contain precious memories that can never be replaced should they be gone. The most common way to lose your files (unintentionally) is through HDD failure. Sometimes you can spot a dying HDD but in other cases, they just come and go without any warnings. It is thus vital to store the files in at least two locations. Today, I will be teaching you to do just that. Time to learn how to setup a scheduled backup of your files!


