I’ve been looking for a way to properly send emails from my custom domains (such as the domain you are on now, swiftworld.net) but I’ve been searching for the wrong services. I do not need a mailbox or any storage space, I just need to be able to send an email from someone@mydomain.com. I’ve finally found the “proper†way of doing things and for those of you who don’t send hundreds and thousands of emails daily, this will be a free solution for you as well.
[toc]
Introduction
What you need is a Transactional Email Service. There are two free alternatives at the moment but I’ll only be covering one of them. The steps should be more or less similar except that you will have to navigate the different control panels yourself. There are some pre-requisites you have to meet for this guide to work:
- A domain that you own or have control over
If you don’t already own a domain, you can purchase one or transfer yours over to the domain name registrar NameSilo. I’ve been using them for the past few years and the price and features they provide is fantastic. You can use my coupon code: SWIFTWORLD and you’ll get a dollar off your purchase. The guide will be based off the NameSilo control panel. Your registrar should have similar tools available as well. - A registrar that allows email forwarding
This is crucial as ultimately people will be replying to the email address you are sending from. NameSilo allows you to add email forwards easily through their control panel. Many if not most registrars should have such features available too. - A client to send emails (Gmail, Outlook etc.)
I will go through using both Gmail and Outlook. You basically need an email client to send the mails. Technically you can use the web to submit an API request etc. but I will not be covering that in this guide. - A Transactional Email Service account
There are two more well-known providers that give free emails: SendGrid and MailGun. I’ll be covering SendGrid so if you would like to follow the guide exactly, you can head on down to register an account. SendGrid gives you 12000 free emails every month.
I can just set my “From†email address and send from my domains!
It works but there are a two major problems if you do that. Firstly, if you are using your current email service sending server (for example Gmail), your email will have this “send on behalf of / via†words behind your sending address. That doesn’t look professional at all.
Secondly, your email may get flagged for potential scam/phishing due to lack of proper certification and authentication. This increases the chances that your email ends up in someone’s junk/spam folder. You will be able to correct this problem by adding a txt record (something we will cover later) but then again, this doesn’t solve the first problem.
Configuring Your Domain Name
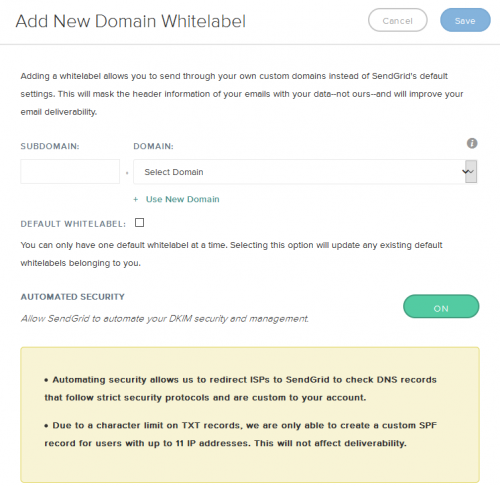
Make sure you’ve gotten all the pre-requisites done (or have your own workarounds if any). The first thing you will want to do is to head on into your SendGrid account > Settings > Whitelabels (https://app.sendgrid.com/settings/whitelabel). What whitelabels will help you with is to remove the “send on behalf of†message that will appear should you not add your domains to the list.
Simply enter a subdomain of your choice and then your own domain name before clicking on “Saveâ€. It will then bring you to another screen with a few things you will need to copy and paste. What you see there are values that you should paste into your domain records under the type “CNAMEâ€.
“Host†will be the hostname of YOUR domain and “Data†should be the values entered into the “VALUES/TARGET HOSTNAME†box. For NameSilo users, go to your “Manage DNS†of the domain that you are currently configuring and simply add 3 new CNAME records, copying and pasting the values you see on your SendGrid page accordingly.
The changes will not take place immediately. It requires some time and it varies from days to days, registrars to registrars. Mine took at least an hour for changes to fully take place. After giving it some time, you can simply press the “Validate Record†Button to validate that the settings are done properly.
Another thing you will need to do is to add SendGrid’s mail server into your domain’s records. This is done through a TXT/SPF record. On the same page where you add the CNAME records, there should be an option to add a TXT/SPF record. For this, leave the hostname blank and in the text/values section, enter the following:
v=spf1 a mx include:sendgrid.net ~all
If you already have such a record configured, you will have to add the “include:sendgrid.net†into whatever you have currently. You can simply add that after the “v=spf1â€. Do note that you should not have more than 10 such records (You can read more by Googling, I assume that your records should be blank anyways if you are following this guide).
We are more or less done and ready to send our first email!
Summary (Tasks completed):
- You’ve Whitelisted your domain name in SendGrid by entering the values given by them into your domain records and validating your domain in their control panel.
- You’ve added/edited a TXT/SPF record to include sendgrid.net
Configuring your Email Client
Outlook
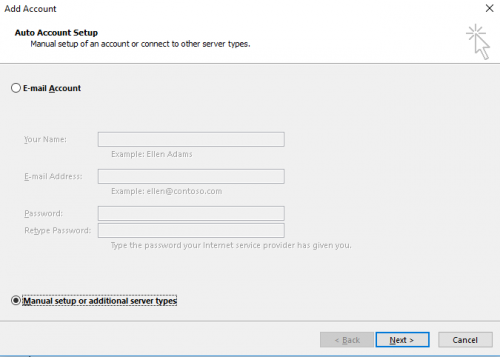
Start by adding a new account. In the first account setup screen, select the option for manual setup.
Select POP or IMAP as the service as in the following screen, input the values accordingly. This is what I would do if I want to send as “swift@swiftworld.net†For incoming mail server, simply enter a dash and for outgoing mail server, enter “smtp.sendgrid.net†For the Logon information, enter your SendGrid Username and password.
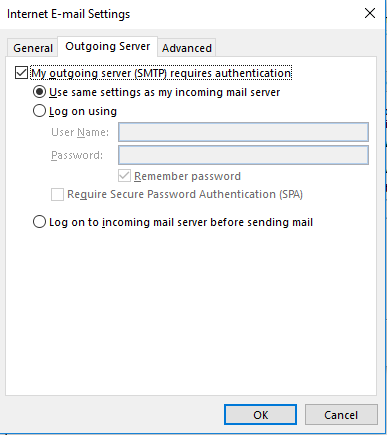
Click on “More Settings†and under the “Outgoing Server†tab, make sure you check the box My outgoing server (SMTP) requires authentication.
Once done click on “Ok†and before you hit on “Nextâ€, make sure the “Automatically test account settings†option is unchecked.
You’re done and ready to send your emails!
Set the account as “Send Onlyâ€
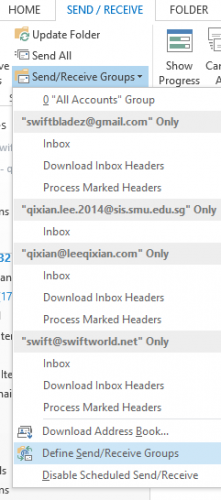
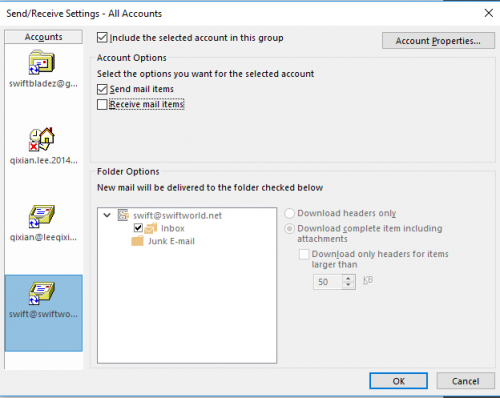
To prevent the receive errors from appearing, you will need to exclude the email account from auto receiving. Under the Send/Receive tab, click on “Send/Receive Groups†and select “Define Send/Receive Groups†option. You will modify the “All Accounts†group.
Select the account that you have added and uncheck the “Receive Mail Items†option
Gmail
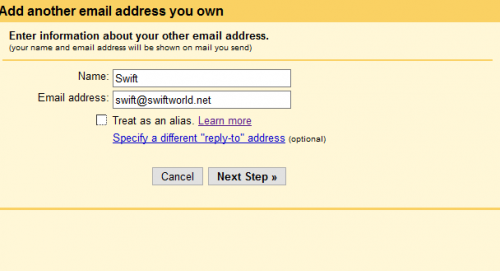
If you’re using the Gmail interface to send your emails, enter your settings page via the gear at the top right and then selecting the “Accounts and Import tabâ€. Under the section of “Send mail asâ€, click on the add to add your new domain. You can learn more about the “Treat as an alias†option but for me I’ll leave that unchecked.
Click on “Next Step†and fill in the following:
SMTP Server: smtp.sendgrid.net
PORT: 587
Username: Your SendGrid username
Password: Your SendGrid password
Use recommended setting for secured connection (TLS).
Make sure you have your forwarding settings done and you will have to enter the verification code that will be forwarded to your mail inbox.
Once you have verified that you own the domain, you’re done!
Sending Emails
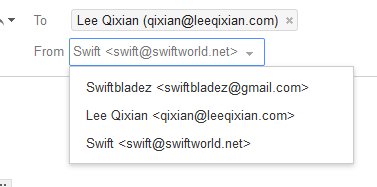
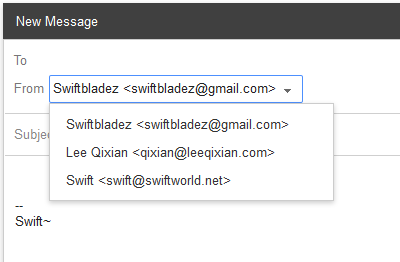
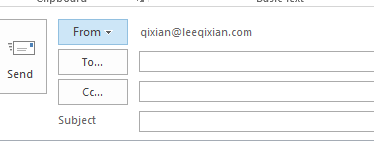
To send emails from your domains, simply select the domain you want to send from by pressing on the “From†button for both Outlook and Gmail users.
Conclusion
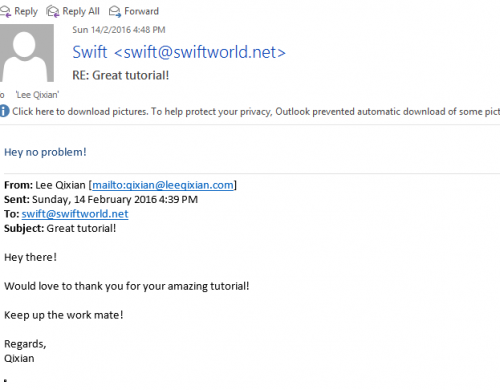
Hopefully this guide is helpful for those of you looking to send from your custom domain names. If you need any help or feel that the guide needs improvement in the different areas, do let me know! Here is the final screenshot of what you should be able to do! (Do cool things such as sending emails to yourself from multiple domain names!)


