A few days back I wrote a guide about backing up your files locally. This time around, I will be teaching you how to backup your files in a remote location say another NAS in another house. For a clearer understanding, do read up on the previous guide. For this guide, I will jump straight into the steps to backup your files remotely and cut short the explanations that are already done previously.
There are two prerequisites that you must meet. Firstly, the remote location should have a SSH server setup at its end. Secondly, the SSH server should be using a key authentication instead of password. A key authentication based login is more secure and will also allow for the commands to work.
If you have all those ready, let us begin by preparing the servers to receive the connections. I will recommend that you create a new user at your remote server for the connection. To do so, simply enter the following command:
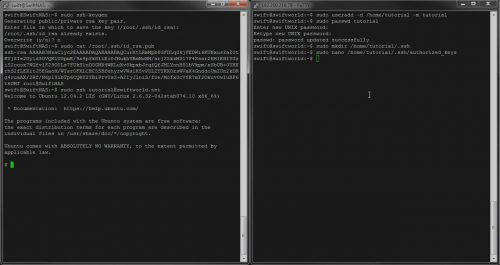
sudo useradd –d /home/tutorial –m tutorial
“/home/tutorial†is the home directory of your new user. Change the variables accordingly. Set your user password by typing:
sudo passwd tutorial
You will also want to create a ssh directory for the user:
sudo mkdir /home/tutorial/.ssh
Now is to establish the public key of your server into the allowed list in your remote server. We want to establish the public key of your server’s root and not the user that you are logged in as. To do so, run the following command to generate your root public key (if you haven’t already done so):
sudo ssh-keygen
Save the file in the default location. Leave the password fields blank. If it asks you if you want to overwrite, type “no†and continue (unless you want to generate a new key). With that done, type the following:
sudo cat /root/.ssh/id_rsa.pub
Now the command interface will produce the authentication key (try brute forcing that). Simply select the whole content (starting with ssh-rsa and ending with root@whatever) and copy it (if you’re using Putty simply highlighting everything will bring it into your clipboard).
Now in your remote server, edit the following file:
sudo nano /home/tutorial/.ssh/authorized_keys
Paste in the key. Now to verify that it is working, ssh into your remote server using your local server:
sudo ssh tutorial@remotesever
It should successfully log you in without asking for any password whatsoever. Once that is done, you can test backing up by typing in the following command:
sudo rsync -azvv -e ssh /local_data tutorial@remote:/remote/backup
rsync should run and you will see that /local_data will be present in /remote/backup. Just a tip, you can reverse that command around to “pull†data from a remote location into your server. This will allow you to backup data from that remote location into your local server.
Once you see everything all working, you can enter it into your crontab schedule! (read the previous guide to learn how to do that. Simply change the execution command portion into the one above).


